OpenStack Cloud Computing Cookbook
http://www.openstackcookbook.com/
Tag Archives: openstack
Thinking of taking the #OpenStack Certified Administrator exam? Up to 50% Off OpenStack Books!
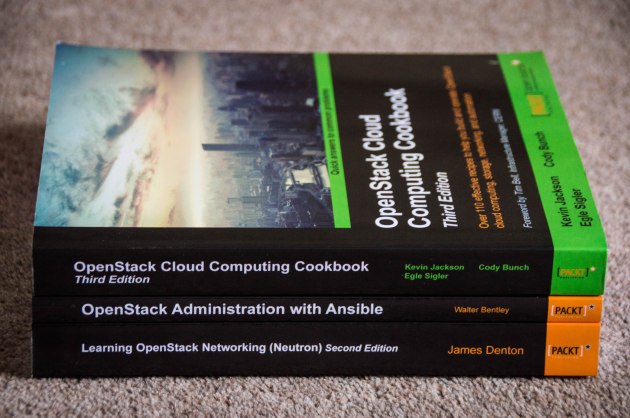
Get your learning on ahead of the OpenStack Certified Administrator exam by purchasing the above books written by Rackspace OpenStack authors!
OpenStack Cloud Computing Cookbook, 3rd Edition by Kevin Jackson, Cody Bunch and Egle Sigler
-50% on eBook code is OCCTE50 (http://bit.ly/203VVcg)
-30% on print code is OCCTE30 (http://bit.ly/203VVcg)
Learning OpenStack Networking (Neutron), 2nd Edition by James Denton
-50% on eBook code is LSNNSE50 (http://bit.ly/1UU4IKj)
-30% on print code is LSNNSE30 (http://bit.ly/1UU4IKj)
OpenStack Administration with Ansible by Walter Bentley
-50% on eBook code is CONEB50osaa (https://goo.gl/ARBFPm)
-30% on print code is CONPRT50osaa (https://goo.gl/ARBFPm)
Book Discount Codes; Love in Tokyo

Understand, install, configure, and manage Nova
It’s time to say sayonara to the OpenStack Summit in Tokyo, but never fear, if you weren’t one of the lucky Stackers to grab one of the signed copies of the OpenStack Cloud Computing Cookbook or Learning OpenStack Networking (Neutron) then use the following codes:
50% Off ebook: OpenStack50
30% Off print: OpenStack30
These codes are valid until November 15th direct from PacktPub. The print copy includes the ebook too in non DRM format to use on whatever device you use.
More information can be found here: http://bit.ly/1LWUkQj
The OpenStack Cloud Computing Cookbook – Third Edition – is now available to purchase!
Thanks to Cody Bunch and Egle Sigler – and whole bunch of tech reviewers spanning the cloud and OpenStack community, the OpenStack Cloud Computing Cookbook has had its 3rd reboot. We cover configuration of Nova, Neutron, Glance, Keystone, Cinder and Swift. We show you how to use these. We show you how to use Ansible to deploy this in your datacentre. We show you how to use things like Heat and Cloud-Init to automate your cloud application environments as well as the latest and greatest like DVR and FWaaS.
We provide this with an accompanying multi-node Vagrant environment, where you can try out the steps in the book using free and open source stools such as VirtualBox and Vagrant – and we always make the latest versions of OpenStack available here too.
This is the best book in the series by far and now it’s available to buy here.
-Kevin Jackson
Installing and Configuring OpenLDAP
In order to operate OpenStack Identity service with an external authentication source, it is necessary that one have an external authentication service available. In the OpenStack Cloud Computing Cookbook, we used OpenLDAP. As installing and configuring OpenLDAP is beyond the scope of the book, that information is provided here.
Getting ready
We will be performing an installation and configuration of OpenLDAP on it’s own Ubuntu 14.04 server.
How to do it…
We will break this into two steps: installing OpenLDAP, and configuring it for use with OpenStack.
Installing OpenLDAP
Once you are logged in, to your Ubuntu 14.04 node, run the following commands to install OpenLDAP:
We set the Ubuntu installer to non-interactive, as we will be providing the configuration values for OpenLDAP prior to installation:
export DEBIAN_FRONTEND=noninteractive
Next we provide an admin password so OpenLDAP will install:
echo -e " \
slapd slapd/internal/generated_adminpw password openstack
slapd slapd/password2 password openstack
slapd slapd/internal/adminpw password openstack
slapd slapd/password1 password openstack
" | sudo debconf-set-selections
Finally, we install OpenLDAP via slapd package:
sudo apt-get install -y slapd ldap-utils
Configuring
OpenStack has a few requirements regarding which attribute types are used for user information. To accomodate this in our OpenLDAP we need to add these values to the new-attributes schema file:
sudo echo "
 attributetype ( 1.2.840.113556.1.4.8 NAME 'userAccountControl'
 SYNTAX '1.3.6.1.4.1.1466.115.121.1.27' )
objectclass ( 1.2.840.113556.1.5.9 NAME 'user'
 DESC 'a user'
 SUP inetOrgPerson STRUCTURAL
 MUST ( cn )
 MAY ( userPassword $ memberOf $ userAccountControl ) )
" >> /etc/ldap/schema/new-attributes.schema
Finally, restart OpenLDAP:
sudo service slapd restart
How it works…
What we have done here is install OpenLDAP on Ubuntu 14.04. Additionally we created an LDAP schema, configuring the userAccountControl property, and configuring a ‘user’ object to provide login authorization.
Pre-Order OpenStack Cloud Computing Cookbook and get 30% Off Before 25th July!
 The OpenStack Cloud Computing Cookbook, 3rd Edition is due for publication in August 2015. You can reserve a copy and get a whopping 30% Off with the code OCCC30 if used before July 25th 2015 from the Packt website.
We cover Juno and Kilo installations – and always maintain an updated multi-node learning environment with the latest releases at https://github.com/OpenStackCookbook/OpenStackCookbook
This is what we cover in the book to help you install and configure OpenStack for your environment, whether you’re setting up a lab or ready to move to production:
Chapter 1: Keystone – Installation, Setting up SSL, using with LDAP and more!
Chapter 2: Glance – Installation, using with Object Storage, migrating from disk versions and more!
Chapter 3: Neutron – Installation, configuration of OVS, creating networks, using distributed virtual routers and more!
Chapter 4: Nova – Installation, configuration, launching instances, host aggregates and much more!
Chapter 5: Swift – Installation, configuration, rings and more!
Chapter 6: Using Swift – Uploading objects, large objects, containers, container replication and more!
Chapter 7: Administering Swift – monitoring, collecting stats, dealing with failures and more!
Chapter 8: Cinder – Installation, using and configuring 3rd party backends and more!
Chapter 9: More OpenStack – Cloud-init, LBaaS, FWaaS, Ceilometer and Heat!
Chapter 10: Horizon – Installation and configuration and using the dashboard!
Chapter 11: Production OpenStack – configuring HA, clusters, using Galera and other techniques and automation using Ansible!
Get your copy today at bit.ly/1MtAJov with 30% Off Code OCCC30
Pens down. It’s a wrap! OpenStack Cloud Computing Cookbook 3rd Edition coming soon!
 Late Friday night July 3rd 2015, or early evening to my US counterparts, we finished the edits on the OpenStack Cloud Computing Cookbook, 3rd Edition. Wow – 3 Editions.
I started writing the first edition back in 2011. Back then, OpenStack Diablo was THE production ready release. It had many promises and I was keen to learn more after dipping my toes into the OpenStack water with the Bexar release months before. Of course, I pronounced this wrong. So much for a country who frowns upon our additional characters in the English language.
This book was very popular and has taken me on a journey I wasn’t expecting. As time went on, Diablo wasn’t as hot property as it sounds and after being approached by none other than Cody Bunch who convinced me to write another, the 2nd Edition was needed. This was another 10 months getting a “few updates” in the book. This was published in June 2013 and was based on Grizzly.
Fast forward towards the end of 2014 and through a mental lapse, Cody yet again thought it might be a good idea to do another. Along the way of ideas, we picked up the esteemed Egle Sigler. Putting in a few more updates and with 50% more help, this would be a breeze to get the book updated for Juno. Or so we thought.
About 8 months later, we made it. We have updated sections that include how to install the very latest OpenStack Kilo using Ansible. Over 110 recipes has had an upgrade, rewrite or is a brand new addition to the book. We listened and we have a book that takes you through all the essential components and much more. We take you through step by step instructions on how you could run this in your datacentres.
We wouldn’t have made this possible without the immense valuable feedback from our tech reviewers. Thank you for keeping us on track and making this book even better than it was going to be:
Andy McCrae, Sriram Rajan, Melissa Palmer, Stefan Lenz, Chris Beatty, Walter Bentley and Victoria Martínez de la Cruz.
And a big shout out to Tim Bell for writing an excellent foreword to the book. We are truly honoured. I’m expecting a signed copy from him in the post.
So go out and by the thing. You won’t regret it.
Pre-Requisites for the OpenStack Cloud Computing Cookbook lab
The OpenStack Cloud Computing Cookbook has been written in such a way so that our readers can follow each section to understand, install and configure each component of the OpenStack environment. We cover Compute (Nova), Identity (Keystone), Image (Glance), Networking (Neutron), Storage (Cinder and Swift) as well as many other services such as how to install these components using Ansible. As such, there are elements of the OpenStack environment that don’t fit in any particular chapter. These supporting services are:
- Messaging (RabbitMQ)
- Database (MariaDB)
- NTP
- NTP is required on each host in the environment. For details of configuring NTP, visit https://help.ubuntu.com/lts/serverguide/NTP.html
OpenStack clients installation on Ubuntu for the OpenStack Cloud Computing Cookbook
Throughout the OpenStack Cloud Computing Cookbook we expect the reader to have access to the client tools required to operate an OpenStack environment. If these are not installed, they can be installed by following this simple guide.
This guide will cover installation of
- Nova Client
- Keystone Client
- Neutron Client
- Glance Client
- Cinder Client
- Swift Client
- Heat Client
Getting ready
To use the tools and this guide, you are expected to have access to a Ubuntu (preferably 14.04 LTS) server or PC that has access to the network where you are installing OpenStack.
How to do it…
To install the clients, simply execute the following commands
sudo apt-get update
sudo apt-get install python-novaclient python-neutronclient python-glanceclient \
    python-cinderclient python-swiftclient python-heatclient
Once these are installed, we can configure our CLI shell environment with the appropriate environment variables to allow us to communicate with the OpenStack endpoints.
A typical set of environment variables are as follows and is used extensively throughout the book when operating OpenStack as a user of the services:
export OS_TENANT_NAME=cookbook
export OS_USERNAME=admin
export OS_PASSWORD=openstack
export OS_AUTH_URL=https://192.168.100.200:5000/v2.0/
export OS_NO_CACHE=1
export OS_KEY=/vagrant/cakey.pem
export OS_CACERT=/vagrant/ca.pem
Typically these export lines are written to a file, for example called ‘$home/openrc’ that allows a user to simply execute the following command to source in these to use with OpenStack
source openrc
(or in Bash: . openrc)
Configuring Keystone for the first time
To initially configure Keystone, we utilize the SERVICE_TOKEN and SERVICE_ENDPOINT environment variables. The SERVICE_TOKEN is found in /etc/keystone/keystone.conf and should only be used for bootstrapping Keystone. Set the environment up as follows
export ENDPOINT=192.168.100.200
export SERVICE_TOKEN=ADMIN
export SERVICE_ENDPOINT=https://${ENDPOINT}:35357/v2.0
export OS_KEY=/vagrant/cakey.pem
export OS_CACERT=/vagrant/ca.pem
This bypasses the usual authentication process to allow services and users to be configured in Keystone before the users and passwords exist.
How it works…
The OpenStack command line tools utilize environment variables to know how to interact with OpenStack. The environment variables are easy to understand in terms of their function. A user is able to control multiple environments by simply changing the relevant environment variables.
To initially install the users and services, a SERVICE_TOKEN must be used as at this first stage there are no users in the Keystone database to assign administrative privileges to. Once the initial users and services has been set up, the SERVICE_TOKEN should not be used unless maintenance and troubleshooting calls for it.
Installing MariaDB for OpenStack Cloud Computing Cookbook
The examples in the OpenStack Cloud Computing Cookbook assumes you have a suitable database backend configured to run the OpenStack services. This didn’t fit with any single chapter or service as they all rely on something like MariaDB or MySQL. If you don’t have this installed, follow these steps which you should be able to copy and paste to run in your environment.
Getting ready
We will be performing an installation and configuration of MariaDB on the Controller node that is shown in the diagram. MariaDB and MySQL are interchangeable in terms of providing the necessary MySQL database connections required for OpenStack. More information can be found at the MariaDB website. In the examples through the book, the IP address of the Controller that this will be on, and will be used by the services in the book, will be 172.16.0.200.

OpenStack Cloud Computing Cookbook Lab Environment
How to do it…
To install MariaDB, carry out the following steps as root
Tip: A script is provided here for you to run the commands below
- We first set some variables that will be used in the subsequent steps. This allows you to edit to suit your own environment.
export MYSQL_HOST=172.16.0.200
export MYSQL_ROOT_PASS=openstack
export MYSQL_DB_PASS=openstack
- We then set some defaults in debconf to avoid any interactive prompts
echo "mysql-server-5.5 mysql-server/root_password password $MYSQL_ROOT_PASS" | sudo debconf-set-selections
echo "mysql-server-5.5 mysql-server/root_password_again password $MYSQL_ROOT_PASS" | sudo debconf-set-selections
echo "mysql-server-5.5 mysql-server/root_password seen true" | sudo debconf-set-selections
echo "mysql-server-5.5 mysql-server/root_password_again seen true" | sudo debconf-set-selections
- We then install the required packages with the following command
sudo apt-get -y install mariadb-server python-mysqldb
- We now tell MariaDB to listen on all interfaces as well as set a max connection limit. Note, edit to suit the security and requirements in your environment.
sudo sed -i "s/^bind\-address.*/bind-address = 0.0.0.0/g" /etc/mysql/my.cnf
sudo sed -i "s/^#max_connections.*/max_connections = 512/g" /etc/mysql/my.cnf
- To speed up MariaDB as well as help with permissions, add the following line to /etc/mysql/conf.d/skip-name-resolve.cnf
echo "[mysqld]
skip-name-resolve" > /etc/mysql/conf.d/skip-name-resolve.cnf
- We configure UTF-8 with the following
echo "[mysqld]
collation-server = utf8_general_ci
init-connect='SET NAMES utf8'
character-set-server = utf8" > /etc/mysql/conf.d/01-utf8.cnf
- We pick up the changes made by restarting MariaDB with the following command
sudo service mysql restart
- We now ensure the root user has the correct permissions to allow us to create further databases and users
mysql -u root -p${MYSQL_ROOT_PASS} -h localhost -e "GRANT ALL ON *.* to root@\"localhost\" IDENTIFIED BY \"${MYSQL_ROOT_PASS}\" WITH GRANT OPTION;"
mysql -u root -p${MYSQL_ROOT_PASS} -h localhost -e "GRANT ALL ON *.* to root@\"${MYSQL_HOST}\" IDENTIFIED BY \"${MYSQL_ROOT_PASS}\" WITH GRANT OPTION;"
mysql -u root -p${MYSQL_ROOT_PASS} -h localhost -e "GRANT ALL ON *.* to root@\"%\" IDENTIFIED BY \"${MYSQL_ROOT_PASS}\" WITH GRANT OPTION;"
- We run the following command to pick up the permission changes
mysqladmin -uroot -p${MYSQL_ROOT_PASS} flush-privileges
How it works…
What we have done here is install and configure MariaDB on our Controller node that is hosted with address 172.16.0.200. When we configure our OpenStack services that required a database connection, they will use the address format mysql://user:password@172.16.0.200/service.
See Also
The 3rd Edition of the OpenStack Cloud Computing Cookbook covers installation of highly available MariaDB with Galera
Configuring Ubuntu Cloud Archive for OpenStack
Ubuntu 14.04 LTS, the release used throughout this book, provides two repositories for installing OpenStack. The standard repository ships with the Icehouse release of OpenStack. Whereas a further supported repository, called the Ubuntu Cloud Archive, provides access to the latest release (at time of writing), Juno. We will be performing an installation and configuration of OpenStack Identity service (as well as the rest of the OpenStack services) with packages from the Ubuntu Cloud Archive to provide us with the Juno release of software.
Getting ready
Ensure you have a suitable server available for installation of the OpenStack Identity service components. If you are using the accompanying Vagrant environment as described in the Preface this will be the controller node that we will be using.
Ensure you are logged onto the controller node and that it has Internet access to allow us to install the required packages in our environment for running Keystone. If you created this node with Vagrant, you can execute the following command:
vagrant ssh controller
How to do it…
Carry out the following steps to configure Ubuntu 14.04 LTS to use the Ubuntu Cloud Archive:
- To access the Ubuntu Cloud Archive repository, we first install the Ubuntu Cloud Archive Keyring and enable Personal Package Archives within Ubuntu as follows:
sudo apt-get update
sudo apt-get install -y software-properties-common ubuntu-cloud-keyring
- Next we enable the Ubuntu Cloud Archive for OpenStack Juno. We do this as follows:
sudo add-apt-repository -y cloud-archive:juno
sudo apt-get update
How it works…
What we’re doing here is adding an extra repository to our system that provides us with a tested set of packages of OpenStack that is fully supported on Ubuntu 14.04 LTS release. The packages in here will then be ones that will be used when we perform installation of OpenStack on our system.
There’s more…
More information about the Ubuntu Cloud Archive can be found by visiting the following address: https://wiki.ubuntu.com/ServerTeam/CloudArchive. This explains the release process and the ability to use latest releases of OpenStack—where new versions are released every 6 months—on a long term supported release of Ubuntu that gets released every 2 years.
Using an alternative release
If you wish to optionally deviate from stable releases, it is appropriate when you are helping to develop or debug OpenStack, or require functionality that is not available in the current release.
To use a particular release of PPA, for example, the next OpenStack release Kilo, we issue the following command:
sudo add-apt-repository cloud-archive:kilo
